ai-evals-course
Install Build Review Interface
Pick your agent. Every command is ready to paste.
npx skills add ai-evals-course/evals-skills --skill build-review-interfaceThe open skills CLI detects your agents (Claude Code, Cursor, Codex and 70+ more) and installs to the right folder. Add -g to install globally.
01
Install it
Run the command above, or upload the folder in Claude.
02
Ask naturally
Describe the task. Your agent loads build-review-interface when the request matches its description.
03
Name it if needed
If it does not trigger, say “use the build-review-interface skill”. In Codex, type $build-review-interface.
Build a Custom Annotation Interface
Overview
Build an HTML page that loads traces from a data source (JSON/CSV file), displays one trace at a time with Pass/Fail buttons, a free-text notes field, and Next/Previous navigation. Save labels to a local file (CSV/SQLite/JSON). Then customize to the domain using the guidelines below.
Data Display
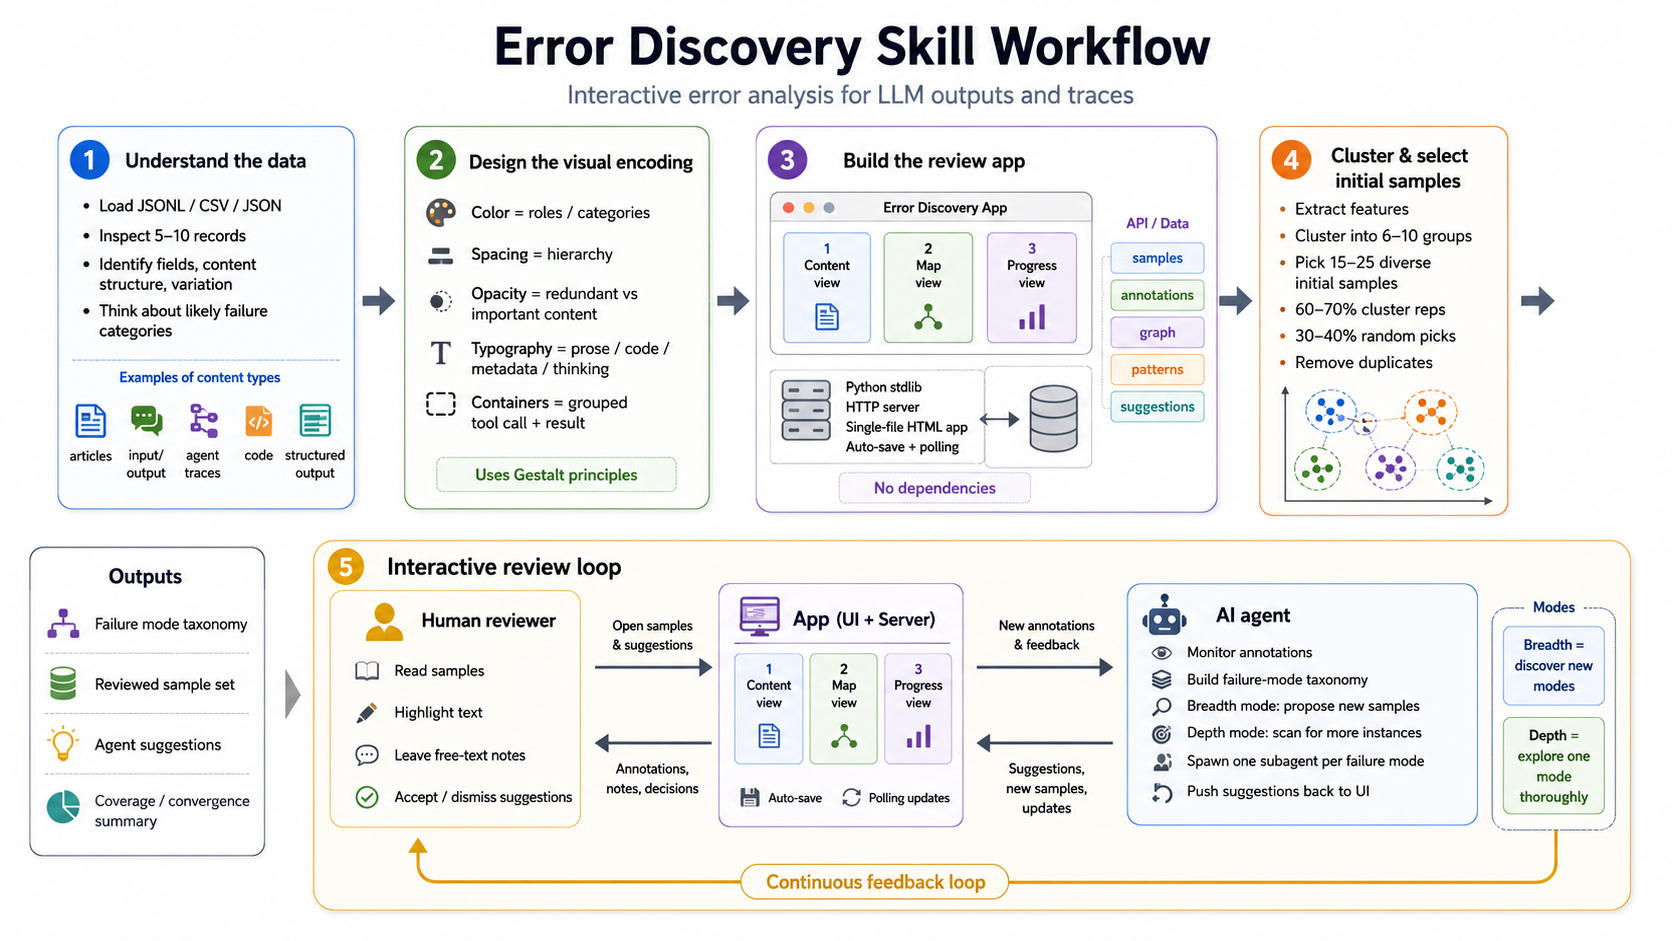
Format all data in the most human-readable representation for the domain. Emails should look like emails. Code should have syntax highlighting. Markdown should be rendered. Tables should be tables. JSON should be pretty-printed and collapsible.
- Collapse repetitive elements. If every trace shares the same system prompt, put it in a
<details>toggle. - Extract and surface key metadata. If traces contain a property name, client type, or session ID buried in the data, extract it and display it prominently as a header or badge.
- Color-code by role or status. Use left-border colors to distinguish user messages, assistant messages, tool calls, and system prompts at a glance.
- Group related elements visually. Tool calls and their responses should be visually linked (indentation, shared border).
- Collapse what doesn't help judgment. Verbose tool response JSON, intermediate reasoning steps, and debugging context go behind toggles.
- Highlight what matters most. Make the primary content reviewers judge visually dominant. Bold key entities (prices, dates, names). Use font size and spacing to create hierarchy.
- Show the full trace. Include all intermediate steps (tool calls, retrieved context, reasoning), not just the final output. Collapse them by default but keep them accessible.
- Sanitize rendered content. Strip raw HTML from LLM outputs before rendering. Disable images in rendered markdown if they could be tracking pixels.
Feedback Collection
Annotate at the trace level. The reviewer judges the whole trace, not individual spans.
- Binary Pass/Fail buttons as the primary action.
- Free-text notes field for the reviewer to describe what went wrong (or right).
- Defer button for uncertain cases.
- Auto-save on every action.
Once you have established failure categories from error analysis, you can later add predefined failure mode tags as clickable checkboxes, dropdowns or picklists so reviewers can select from known categories in addition to writing notes. But don't add these in the initial build.
Navigation and Status
- Next/Previous buttons and keyboard arrow keys.
- Trace counter showing position and progress ("12 of 87 remaining").
- Jump to specific trace by ID.
- Counts of labeled vs unlabeled traces.
Keyboard Shortcuts
Arrow keys = Navigate traces
1 = Pass              2 = Fail
D = Defer             U = Undo last action
Cmd+S = Save          Cmd+Enter = Save and next
Selecting Traces to Load
Build the app to accept traces from any source (JSON/CSV file). Keep sampling logic outside the app in a separate script. Start with random sampling.
Additional Features
Reference panel: Toggle-able panel showing ground truth, expected answers, or rubric definitions alongside the trace.
Filtering: Filter traces by metadata dimensions relevant to the product (channel, user type, pipeline version).
Clustering: Group traces by metadata or semantic similarity. Show representative traces per cluster with drill-down.
Design Checklist
- Same layout, controls, and terminology on every trace
- Pass and Fail buttons are visually distinct (color, size)
- Keyboard shortcuts work for all primary actions
- Full trace accessible even when sections are collapsed
- Labels persist automatically without explicit save
- Trace-level annotation (not span-level) as the default
- All data rendered in its native format (markdown as HTML, code with highlighting, JSON pretty-printed, tables as HTML tables, URLs as clickable links)
Testing
After building the interface, verify it with Playwright.
Visual review: Take screenshots of the interface with representative trace data loaded. Review each screenshot for:
- Layout and spacing: is the visual hierarchy clear? Can you immediately see what matters?
- Readability: is all data rendered in its native format? Are there any raw JSON blobs, unrendered markdown, or unstyled content?
- Aesthetics: does the interface look professional and clean? Would a domain expert use this?
- Responsiveness: does the layout hold at different window sizes?
Functional test: Write a Playwright script that performs a full annotation workflow:
- Load the app and verify traces are displayed
- Click Pass on a trace, verify the label is saved
- Click Fail on a trace, add a note, verify both are saved
- Click Defer, verify it is recorded
- Navigate forward and backward with buttons and keyboard shortcuts
- Verify the trace counter updates correctly
- Verify auto-save by reloading the page and checking labels persist
- Expand collapsed sections (system prompts, tool calls) and verify content is accessible
- Test that all keyboard shortcuts trigger the correct actions
Tips for Build Review Interface
- • Start a fresh session after installing so your agent picks up the new skill.
- • It is part of a pack with 9 skills. Install only the ones you need with --skill to keep triggers precise.
- • If two skills overlap, mention the one you want by name.
Questions about Build Review Interface
What does the Build Review Interface skill do?
Build a custom browser-based annotation interface tailored to your data for reviewing LLM traces and collecting structured feedback. Use when you need to build an annotation tool, review traces, or collect human labels.
How do I install Build Review Interface?
Run "npx skills add ai-evals-course/evals-skills --skill build-review-interface" in your project. The skills CLI installs it for Claude Code, Cursor, Codex and 70+ other agents. In Claude on the web, upload the skill folder as a ZIP under Customize > Skills.
Does Build Review Interface work in Cursor and Codex?
Yes. Build Review Interface uses the open SKILL.md format, so it works in Claude Code, Claude, Cursor, OpenAI Codex, Gemini CLI, GitHub Copilot and other agents that support agent skills.
Is Build Review Interface free?
Build Review Interface is open source on GitHub under the Apache-2.0 license. It is free to install; check the license before commercial use.
Who made Build Review Interface?
Build Review Interface is published by ai-evals-course in the ai-evals-course/evals-skills repository, together with 8 other skills.